
INSTALL IT LIKE A PRO....
Materials you will need:
- New toilet
- Wax ring
- Toilet mounting bolts
- Adjustable wrench
- Screwdriver
- Level
 Propane torch
 Striker
 Tubing cutter
 tubing bender tool
 Adjustable wrench
 Drill/driver
 Hacksaw
 Jigsaw
 Handsaw
 Level
Level Screwdriver
 Tape measure
 Utility knife

Step 1: Remove the old toilet
To remove the old toilet, first turn off the water supply to the toilet by closing the shut-off valve located on the wall behind the toilet. Flush the toilet to empty the tank and bowl. Next, use a bucket and a sponge to remove any remaining water from the bowl and tank. Disconnect the water supply line from the bottom of the tank by loosening the nut with an adjustable wrench. Remove the mounting bolts that hold the toilet to the floor using a screwdriver or a wrench. If the bolts are rusted or corroded, you may need to use a hacksaw or a reciprocating saw to cut them off. If you want to learn about plumbing online, click here
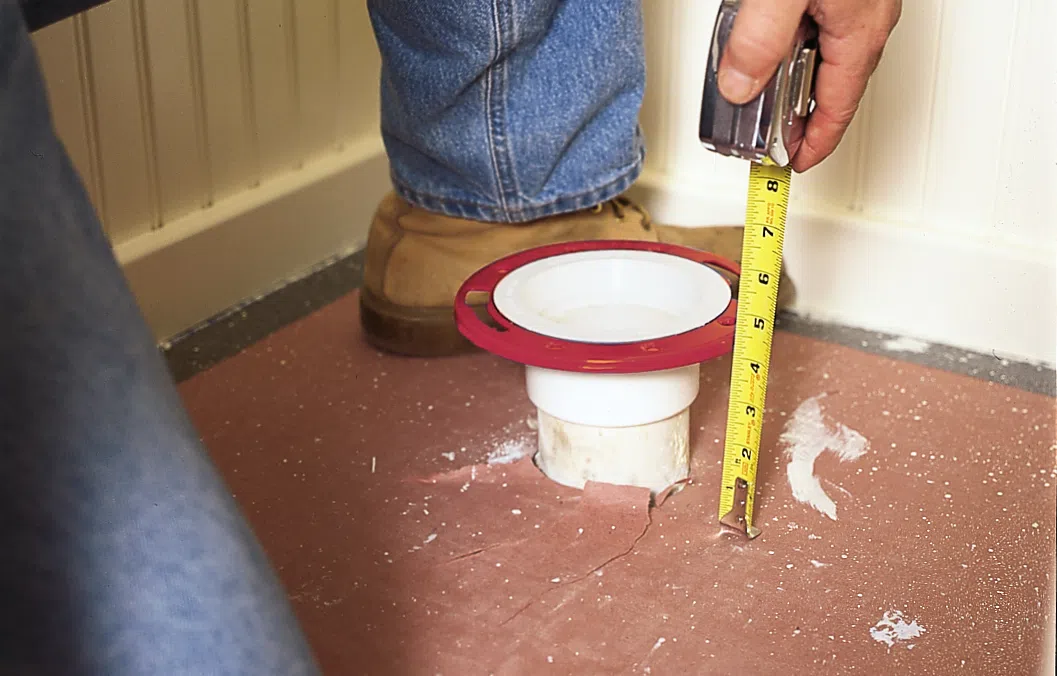
Step 2: Prepare the area
After removing the old toilet, clean the area around the flange on the floor where the toilet was mounted. Remove any old wax residue or debris using a putty knife or a scraper. Inspect the flange and make sure it is securely attached to the floor. If the flange is damaged or broken, it will need to be replaced before installing the new toilet.
Step 3: Install the wax ring
The wax ring is a crucial component of the toilet installation, as it creates a watertight seal between the toilet and the drain pipe. Place the wax ring on the flange, making sure it is centered and level. Press down on the wax ring to compress it slightly and ensure a good seal.

Step 4: Install the new mounting bolts
Insert the new toilet mounting bolts into the flange, making sure they are perpendicular to the floor. The bolts should fit snugly into the flange without wobbling. If the flange is not level or if the bolts do not fit properly, you may need to use shims or a flange extender to correct the problem.
Step 5: Position the toilet
Carefully position the new toilet over the mounting bolts, making sure the bolts go through the holes in the base of the toilet. Lower the toilet onto the wax ring, applying gentle pressure to compress the wax ring and create a seal. Use a level to check that the toilet is level both front to back and side to side. Make any necessary adjustments by adding or removing shims.

Step 6: Attach the tank to the bowl
Once the toilet is in place, attach the tank to the bowl using the mounting bolts that came with the toilet. Place a rubber gasket or a washer over each bolt, then insert the bolts through the holes in the tank and the bowl. Tighten the nuts by hand, then use an adjustable wrench to snug them up. Be careful not to over-tighten the nuts, as this can crack the porcelain.
Step 7: Connect the water supply
Connect the water supply line to the bottom of the tank by tightening the nut with an adjustable wrench. Turn on the water supply valve and let the tank fill with water. Check for leaks around the base of the toilet and around the water supply line. If you detect any leaks, tighten the connections or replace the faulty parts.
Step 8: Test the toilet
Flush the toilet a few times to make sure it is working properly and there are no leaks. If everything is working as it should, attach the toilet seat to the bowl using the screws provided. Follow the manufacturer's instructions for tightening the screws.

Congratulations, you have successfully installed a new toilet! By following these steps, you can save money on plumber fees and enjoy the satisfaction of completing a DIY project. If you have any questions or encounter any difficulties during the installation process, don't hesitate to consult us for help and guidelines.


0 Comments